Start a Craft Business

Make Money Crafting

  • Start a Craft Business
  • Some of My Projects

Up-Cycled Cart With Meaning!

I love painting and refinishing furniture.  I especially have to say that when I have fun results like I did with this cart that I come away from a project even more motivated to paint then I started out!  I love this little cart!  And my favorite part may be that I added a little touch of meaning to it!

quotetable4-1024x794

If you know me and my style then you know that words and quotes are my favorite thing.

quotetable6-1024x682

And so naturally I added a quote to my cart.

quotetable7-1024x877

A little reminder to myself that I can glance at while I am curled up on my couch sipping coffee and thinking about life and looking out at the water.

quotetable8-1024x682

No, I will never give up, because the tide will turn.

A reminder I happen to need right now dealing with my home renovations!

quotetable-682x1024

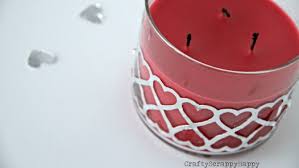
I of course added my quote with rubber alphabet stamps and ink.  For this particular project I used black StazOn because I didn’t want the ink to run or rub off.

quotetablebefore-913x1024

What do you think?  I like the new beautiful sugar cane color versus the bright red.  I used my new Maison Blanche La Craie furniture paint, it adhered perfectly to the metallic surface, yet another reason that I am SO in love with this paint!

quotetable1-682x1024

I think it fits right in with my beach-y chic decor–how about you?!

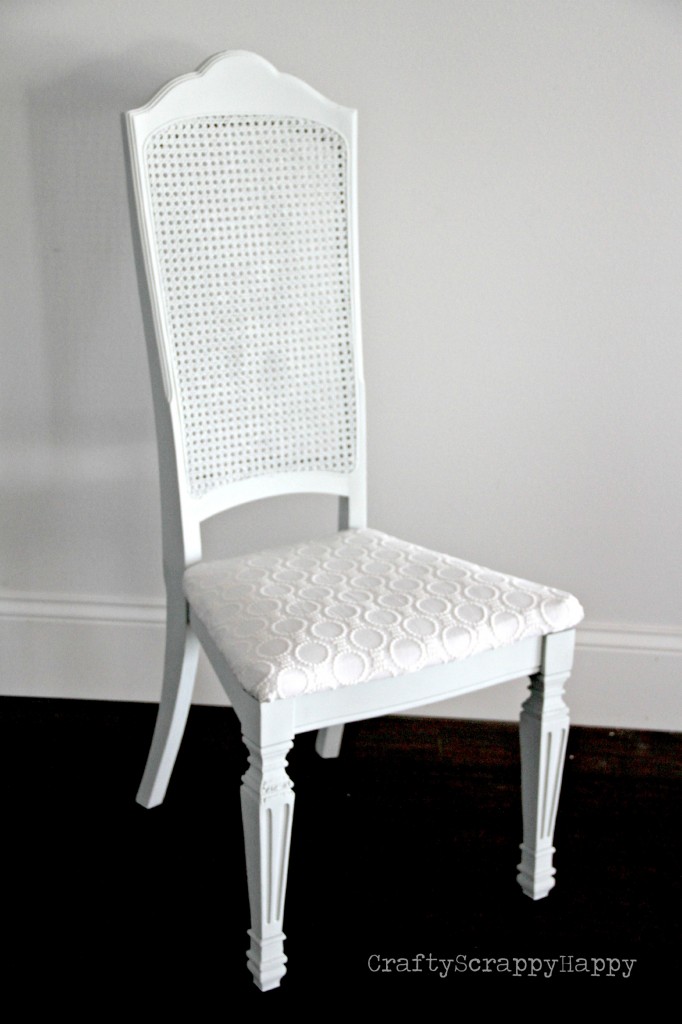
And if you missed my last painting adventure check out my up-cycled chair here!

I am linking up to a few of my favorite parties, you can find them here!

A DIY Chair Makeover

I LOVE a good before and after project!  Especially when the project happens to be sitting in my house!  I had some fun using a new paint Maison Blanche La Craie furniture paint and I have to say I am completely swooning and in love.

chair1-682x1024


Maybe I am so in love with my new paint because it helped me fix up this old chair that has been patiently waiting in my garage for a makeover for over two years now (head in hand with shame).

chair-682x1024


I am sure glad that I never gave up on this guy and just tossed it in the goodwill pile!
The paint that I used for this particular project was SO simple to use, no sanding no priming, so simple!
All I did in this particular case was clean the wood surface to be painted, apply two coats which went on very thick and then wham bam I was done!  And the best part is that there was no odor, so that means that this pregnant gal could paint away!!!  Score!
chair5-1024x1024
Isn’t that color just PERFECTION?!  It is called sugar cane and I suddenly think that I would like every piece of furniture in my house that color!
chair8
And if you think that is an amazing color, check out the rest of the colors in this amazing paint line here!
chair6-682x1024
Isn’t the can even beautiful!?  Now, here is some exciting news, you have a chance to win an AMAZING haul of Maison Blanche La Craie furniture paint and products!
Check out this Mega Maison Blanche Paint Company Giveaway!!!
chair2-674x1024
The Mega Maison Blanche Paint Giveaway winner will receive;
Two(2) Quarts of La Craie furniture paint in the color of their choice.
One(1) Tin of Antique Wax in the color of their choice.
One(1) Glacage Embossing Creme in the color of their choice.
One(1) Organaza Shimmer Coat in the color of their choice.
One(1) Le Craque Crackle Medium.
One(1) Le Dirt Antiquing Dust.
chair7-251x1024

Disclosure:  I was given paint to try and I used it on this project, all opinions are 100% my own.

I love this stuff!


Our Second Huge Stage of Renovation

Its official, you are going to think I am crazy.  I mean to be honest, I think I am a little crazy myself.  BUT, sometimes you just have to jump in and swim with huge projects right?!  Well that is what I am telling myself.  Because this past weekend we got BUSY (and by we I mean my in-laws and my husband…) and stared our second phase of renovations on our fix-er upper lake house.

So what do you think, do you want a little tour of what we have been up to?!?

overall-1024x682 (1)

Meet my upstairs!  It is all bare boned and all studs as of this weekend, and honestly, I think it looks better than when we first toured our house this past winter!

masterbath-1024x682

Before I get into specific detail, let me ask you, can you picture it?  Can you picture my beautiful master bathroom that I am dreaming about?  In the photo above the vanity will be in between the large windows on the back wall and a jetted tub will be to the right of the windows on the side wall.  Can you just picture that?!  Because I am right now and it is what is getting me through the chaos that comes along with renovating!

Okay, so here is what we are taking on:

-full kitchen overhaul

-3 bedrooms (nursery, mater and guest)

-2 bathrooms (master and guest/kids)

Thats it, when you look at it in that little list it may not feel like such a huge project…. but ooooh it sure is!

Okay, here are some before and during photos!

masterbeforeduring-1024x703

Prior to us moving in I snapped a few photos the one on the left is one of them.  Even when we toured our house under a year ago I pictured the cluttered space by those windows as my master bath.  The room was more of a rec room than a bedroom but we saw master bedroom and bathroom written all over it!  I can’t believe that we are finally moving toward that goal and dream!

guestbeforebeforeduring-1024x703

The guest bedroom upstairs was our only “livable” upstairs bedroom, in fact last summer I spent a lot of time getting rid of wall paper and painting the dark wood on the walls… it turned out great and dare I even say I liked the room while we used it for guests, but now it is gone!  Down to the studs!

bathroombeforebeforeduring-1024x703

Similar story for the upstairs bathroom.  It was livable but not super usable without an actual shower… but I painted and worked on it and we used it for the months that we lived up there… but now it is all gone!!!

floorplan-1024x639

I thought I would share the floor plan we are using in case you love this stuff like I do and want to get a better feeling for what we are doing!

What do you think?!  Can you picture our upstairs!?  It will be so wonderful when it is finished!  Well, lets face it, anything would be better than the house the way it was and is now!

And now on to our kitchen.

kitchenbeforebeforeduring-1024x703

Just a few snap shots of the before us, before demo and after demo looks of the space!

floorplan1

I am excited to say that my tiny kitchen will be getting MUCH much bigger!  Ohh I am SO going to love my new kitchen!

And for now we are trying to survive like college kids with no stove and dishwasher or kitchen sink for that matter…

picks-1024x633

but all in the name of these beautiful visions I have for the spaces!

So here is my official sorry for being a little MIA here on the blog lately, but literally every single free moment I have has been spent talking to tile shops, cabinet people, shower specialists and the list goes on and on.  I am hoping that things settle down soon and that I get some time to get back to my normal schedule.  One that allows for a lot more time to craft and create!  I do have to say that I do feel a little giddy about the idea of in a few months from now being able to show you the final product!  I wish we could plan a house-warming party together in fact!

But until then don’t get to mad at me for not being great about posting, I will do my best!

And if you like this kind of stuff follow me in instagram–I am having fun snapping photos of our stages and steps on there!

DIY Paper Flowers

diy paper flowers crafty scrappy happy


This weeks blogging challenge was kind of fun.  Make it.  Simple right?!  Pick a pin or project that you have been meaning to do and make it!

I have boards and boards full of ideas and projects on Pinterest just waiting for me to “make them”!

This time around I was looking for something simple and something that I could put my own mark on.  And so I started out with this idea via Martha Stewart that I have had on my DIY Paper Crafts pin boardfor some time now!

Martha used cupcake liners to make her paper flowers, but I used one of my all time favorite crafting mediums my vintage encyclopedia book pages instead.

395690022d24178faab7fda7cc787c89

They are simple looking and they were simple to make.

4d6f92df818c6a7f8de86989ca759a53

So simple that I made two little bouquets for my house on this rainy snowy day in Wisconsin!

And since I did not follow the tutorial exactly I thought I would share a few details of what I did specifically!

I cut circles with scrapbook scissors and then threaded them onto floral wire I had around my house… must have been from a different project!

I then used just a bit of the floral tape to secure my flower in place.  I did this with 3 flowers and then secured them all together to make one large flower.

And finally I secured the wire around a branch.

A simple look and a fun little project right?!

diy paper flower craft

What about you?  Do you have projects that you have pinned and then made?!  I can’t wait to see them TOMORROW at the “Dog Days of Winter Project Challenge”!

Next weeks challenge is “Love It”  so anything Valentines related goes!

Light & White Winter Projects

light-and-white


Happy weekend sweet friends!  I am so excited to share some truly AMAZING features with you today.  I am blown away by the talent that is out there in the blogging world.  And I am blown away by the sweet bloggers that link up to this party!  But enough about that, let’s get inspired, how about some light and white winter projects!?

wk20-7

Valentine Posh Heart via Dear Emmeline

wk20-1

Little Houses in my Laundry Room via Ashbee Design

wk20-2

Simple Valentine Heart Wreaths via White Lace Cottage

wk20-3

Painted Console via Top This Top That

wk20-4

Weight Watchers Strawberry Cream Pie via Barns and Noodles 

wk20-8-678x1024

DIY Valentines Garland via Nalles House

wk20-5

DIY Ribbon Organization

organize9-1024x695


Well, it is official, I am in FULL organizational mode.  I suddenly have a bit more energy, thank you 2nd trimester!.   AND a little motivation thanks to the blogging challenge going on right now {more on that here} and the fact that round two of my home renovations is starting NOW and so my craft room is getting a reorganized and moved to the basement temporarily (more on that later).

And so, part of the deal with my moving my craft stuff to the basement was that I am allowed to keep anything I can “hide” in our main living space upstairs.  You would honestly think that I was never going to see the stuff moving to the basement again for how creative I am being with my organizing and packing things away upstairs all of a sudden!

My first organization project was to condense my out of control ribbon stash into one compact area.

organize3-1024x682

And I am loving it now that it is finished!

Isn’t that kind of how organizing projects go?

I always feel dread and the good old blahhh feelings when I think about starting but then I am thrilled and excited when I see the final product.

But, maybe I am the only one 🙂

organize6-1024x682

It was a lot of work, transitioning bags of random ribbon into organized spools!

I used a variety of vintage and new clothespins as a way to secure and organize my ribbon.

organize5-682x1024 (1)

And then I condensed my stash into a cute piece from a vintage steamer chest that I am not housing some of my favorite crafting supplies in.

organize10-1024x682

When I rolled my ribbon around the clothespins I secured them with sewing pins.  I like how you can combine multiple ribbons onto one clothespins!

Ribbon Organization via Crafty Scrappy Happy

Renovation & Organizing

IMG_0159-1024x682


Well, like I started to tell you on Sunday, it is official, we are on to phase TWO of our home renovations.  It feels like it was just yesterday that we started our first round!  Goodness, we must be a bit crazy!  So above is the BEFORE shot of the room that we are starting with.  This photo actually makes the space look “not that bad” but if you could look a little closer, you would see; 2 layers of wall paper covered in bright red paint, horribly stained carpet and electrical work behind those walls that left us with no choice but to start fresh.

organize13-1024x657

But while we were busy surviving our first round of renovations I temporarily made this bedroom into my craft room storage space.

But not anymore!

And so this past weekend I had no choice but to “move out”.  My crafting supplies are now stored in the basement… and a little tough to get at.  And so here was my deal, I was allowed to keep any and all craft supplies out and upstairs that I could possibly fit into my living spaces in a discrete and organized way.

And so I have been organizing my craft supplies in every single unused piece of furniture I own!

organize11-1024x682

Including my vintage card catalogue.  Turns out it is kind of an amazing way to store my crafting supplies that I couldn’t part with!

organize12-1024x675

 also got creative and found that my vintage steamer trunk that use as a coffee table is actually a perfect space to store supplies as well!  I shared how the trunk had drawers, one of them I used to store my ribbons that I JUST organized!

organize5-682x1024

You can find the full post on this project {here}.

organize-1024x682

And see, you wouldn’t even know that I am storing a ton of my craft supplies in that pretty trunk can you?!?

inbetweenspace4-1024x662

So, no fear, I am well-organized for this round of renovating.  The crafting will continue!  Especially since I am not allowed to be very involved with this part of the renovating…  this little bean of a baby in my belly comes first!

DIY Water Color Anchor Canvas

DIY WATER COLOR ANCHOR CANVAS via Crafty Scrappy Happy


It is official, I am 100% back into beach-y decor mode!

It seems as though I have taken a short break, enjoyed Christmas andddd now I am ready to get back to the beach.

Now if only this Wisconsin weather would work with me on that one!

Don’t get me wrong, I am having a great time enjoying the big huge ice skating rink in my backyard, but boy would I rather be swimming in that lake!

diy-beach-inspired-wall-art-ideas10

Maybe another reason why I am SO edited for the warm weather is that we will be closer to meeting our little baby bean!

But since the summer weather is months away, I will stick to beach crafting to get me excited!

Since I am not naturally amazing at painting, I grabbed my good old watercolors for this project and just painted on top of a vinyl adhesive of an anchor that I had around from a different project.  After I had the watercolor just right I took the vinyl off of my canvas, and this is what I have.

A super simple watercolor canvas that reminds me of the summer!

If you want to know more about how to start a craft business check out this article.

I am still debating if I should add words…. what do you think?!

Dressing Up a Candle for Valentines!

I started my Valentines Day crafting with my simple DIY canvas, and had to keep the crafting going by doing what I love to do, dressing up a store-bought candle!  This is officially the third holiday I have now covered with my candle decorating.  My painted Halloween candle, my glitter Christmas candle and now heart Valentines candle!

acc5678da2061d7be888eae301f63a76

images

All I did was use my Letter Press dies to cute out my border out of aluminum foil.  I then fastened the boarder with hot glue.  And if you missed my simple DIY canvas that I used the hearts for, check them out here.

3137b6d7134cdf974c2b60b317f887f1

Sweet and simple, and just enough to add a little Valentines decor to an otherwise boring candle!

Winter Blogging Challenge

Okay, I don’t know if I am the only one, but there is just something about the few months right after Christmas that leave me feeling a bit blahhh about crafting at times.  I think that it has something to do with not being able to decorate for huge holidays and not being able to do fun summer projects.  Between the two, I am left feeling like I could use a little push in the creativity department this time of the year.  And soooo, I am teaming up with 9 lovely and talented ladies (you may recognize them from the giveaway I did this past month) to bring you an interactive winter challenge!  I think it is going to be really fun!  AND I really really hope that you will consider joining in!
Here is the complete lowdown!
The same gals that joined together for the $1,000 Christmas Cash Giveaway are now joining forces to bring you “The Dog Days of Winter” Weekly Challenges & Linky Parties!!
Dog Days draft
Tonya from Love of Family & Home
Jennifer from The Francis Family Blog
Mandy from House of Rose
Jennifer from Blissfully Ever After
Jaime from Crafty, Scrappy, Happy
Taryn from Design, Dining & Diapers
Carmel from Our Fifth House
AP from I Love You More Than Carrots
Liz from Liz Marie Blog
Here is a little breakdown of the weekly challenges:
Monday, January 14th – Organize It!
Everybody is in the mood to organize after the New Year & we know that you have some fabulous organizing ideas to share! Organize any area of your home & link up with us! It can be a cabinet, a drawer, a closet, or even an ENTIRE room!
Monday, January 21st – Thrift It!
Who doesn’t appreciate a good thrift store find?! Upcycle any thrift store (or yard sale) item & link up with us!
Monday, January 28th – Make It!
You know those thousand things you’ve pinned to your Pinterest boards?! Well, it’s time to stop pinning & start doing! Choose one (or more) of your pins and MAKE it!! Then, link up!
Monday, February 4th – LOVE It!
Valentine’s Day is just around the corner!! We want to see all of your fabulous Valentine’s day ideas, crafts, and/or projects! Be sure to show them off at our linky party!!

The fun begins NEXT Monday!! We will be sharing our organizing projects with YOU & you will be sharing yours with US!! 

Link up on JUST ONE of our blogs & your project will be seen on ALL NINE blogs!! This is a great way to for you to show off your talent & should generate lots of traffic for your blog! We will sharing our favorites on social media as well as pinning those items to our Pinterest boards!! So don’t miss out!!

It’s time to GET BUSY!!! You know that junk drawer that’s been driving you mad for months now….GO ORGANIZE IT!!!

We can’t wait to see your projects!!!

So what do you think?!  Will you be marking your calendars and joining in the fun?  I hope so!

« Previous Page
Next Page »

Tips for starting your business

  • What Licenses Do Crafters Need to Sell at Craft Shows?
  • How to Start a Craft Business
  • How Much Money Can You Make with a Craft Business?
  • How To Market a Craft Business
  • Where To Sell Your Craft Products
  • What You Need to Know to Start a Craft Business
  • Starting a Craft Business: Partner Up Or Go It Alone?
  • How To Make Craft Products That Stand Out From The Crowd
  • How to Take High Quality Photos That Will Sell Your Crafts
  • Costs to Start a Craft Business
  • How to Write Descriptions That Sell Your Craft Products
  • How to Make Crochet Products That Actually Sell

Copyright © 2021 Starting a Crafting Business Privacy